I'd like to share some trick that I used to do to check out my character's Spacing. I used Animation Snapshot in Maya to help me to understand Spacing. There are some other tools which are better than Animation Snapshot but for now i would like to write about this tool first.
At first and in fact up until today, I am still struggling to understand Spacing. I used to use Animation Snapshot to sort of give me a clue about what is spacing, to show the ball position on the screen.
So folks, let's jump to the tutorial! :)
1. In this tutorial i'm going to use AM's simple ball rig.
- So, let's Open our scene in Maya.
- On my workspace (please see the image below), I have my Outliner open.

Here I have already put some values to the Ty and Tz
*In order to get this tool works correctly, you should have some animations on your character already. Keep reading the walk through.. everything will make sense later ^^
- If your Outliner is not there you could click this icon:

*Just in case your Outliner disappears, you could also find it on Window > Outliner.
- Click the [+] button on its left to expand the menu.
- You will see Locator 1, click the [+] on its left side again.
- Now you should find Ball Geo, click to select the Geometry (please see the image below)
*make sure that you only have this one selected because we only need a snapshot of the Geometry.

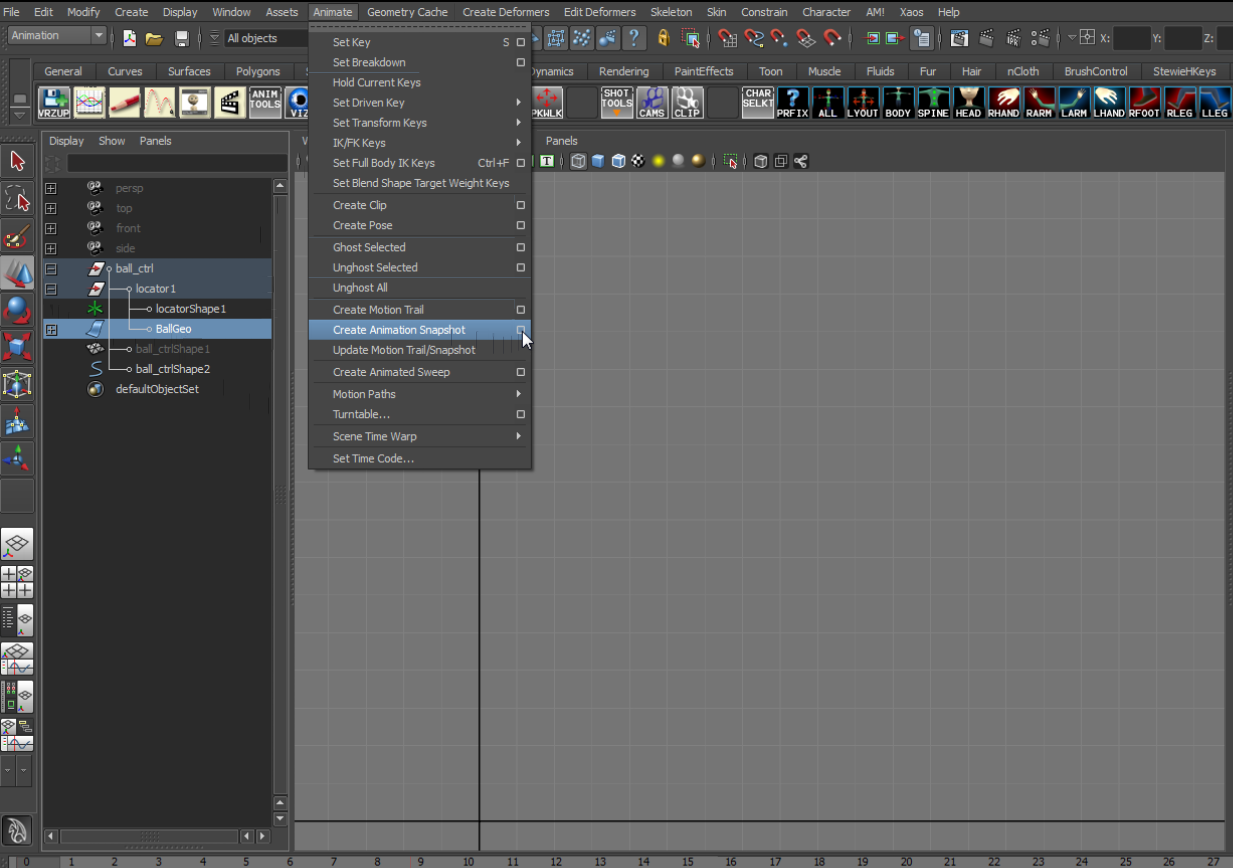
- On the Option Box, you should see something like this:

- Before we do anything, this is not compulsory but i would recommend you to Reset the Settings just to make sure that everything is set on Default.

- The only thing that I played around in this tool is the Start and End time. I like to set the time range manually instead of set it according to the Time Slider. You could set the time range base on the Time Slider if you want to :) This is just my personal preference. I pretty much leave the rest of the options on default settings.
- Once you are ready, click Snapshot. If you want to keep this Option Box open, click Apply.
- On your screen, you should now see something like this :

- You could start editing your curve now :) the cool thing from this tool is you don't have to keep updating the snapshot because this tool will do it automatically.. or in other word is live update :|
- At this stage you could use this tool check on your spacing and see if your animation pops or not,
ie: see if it has huge gap that may cause a pop, a frame before the ball lands.

4. The only thing that you should be very careful is if you want to change the Time Range.
- To change the Time Range, we could simply repeat the steps above and change the Start and End Time values.
- Before you do this, Go back to your Outliner and you should see a new item called snapshot1Group, I would recommend you to delete this before you proceed. The reason is because we don't want to pile up unnecessary items in our scene. This will make your file size bigger and most likely will slow down your system and the worst case scenario, it could crashes your Maya.
- So make sure that you only select the Geometry of the object that you want to analyse and apply this tool to One Geometry at a time to avoid system crash. Otherwise you will get something like this:

and yes i did this a lot too D: not so pretty huh? ^^
see this one looks much better ;)

It looks like this if you had the geometry display on (click 4 on keyboard)

It looks like this if you had the geometry display on (click 4 on keyboard)
This tool pretty much helped me to see how my spacing looked like on my shot. However, i have to say that this tool did not give me a 100% understanding about Spacing. Remember that a Tool is just a Tool, it is there to assist us (i probably just stole that line from my mentor.. !:| ) but anyway.. the point is we should not rely on this 100%. As i mentioned before, you could use this to detect if there is a pop on your animation, to check whether you are on the right track or not, etc.. but remember you should not give your heart and soul to this tool. The down side of this tool is it could consumes a lot of RAM and this would cause problem when we use more complicated rigs (more geometry + more ram = crash :( )
One tip that my mentor told us was Write a list of the Animation Principles and have that list near you when you're animating. This is a golden tip in my opinion.. and i'm really grateful that he shared this tip with us!
Speaking about Spacing, some of you may have watched this webinar and some of you may have not, but if you have a spare time I would highly recommend you guys to watch this webinar hosted by Aaron Hartline and Victor Navone :
Timing and Spacing webinar
There are some very precious demo up there and I find this webinar very, very, very helpful! :)
That's it for now. I hope this helps and thank you very much for taking your time to read this post! If you have any questions or if you found any points that is unclear or confusing, feel free to message me in AM or leave your comments here.
Happy Animating and Have Fun guys! :)
---
No comments:
Post a Comment