Thursday, April 26, 2012

Chapter 4 - Noodle Time

It was half blocking+++++ and half first pass splining. There were some changes that needed to be done after i received my critique. I think this time around i spent a lot of my time on my blocking and i did not bother to try out splining the shot just to figure out how does it look like. This was something that I did during my third shot last term. I got carried away and continue to work on spline and it was really really hard!

Back to present time. There are some changes on some poses at the beginning of the shot. I did not realize that the previous pose that i had was not appealing enough :O ! and this is a really great point that my mentor told me on the critique!! I completely forgot about the principle of Appeal! i will keep this in my mind for my next shot in the future (omg we're going to use bishop!!! :D).

My first pass splining felt wrong in so many ways. This time i tried out non-weighted tangent. Honestly, it was really easy to make the curves look all neat. One thing that i learnt from my progress on week 4 is, i know that maybe a lot of people have mentioned this, we should not make our curves look all neat and tidy bluntly. I did this last week :( .

This is what happened last week. I used non-weighted tangent in graph editor. As i refined the curves, i felt pretty unease because i can't adjust the tangent handles like i normally do if i used weighted tangent. I remember it was mentioned in one of the lectures, that we should not adjust the spacing in our shot using the curves. I sticked to that line and told myself that i'm gonna try this new method and see what happened. So i refined the curve and pretty impressed because it was really easy to clean up the curves. This my friend, was the evil in disguise. I somehow did not realize this at all. I noticed all the wrong stuff in my shot when i was on the plane, hours after I submit the assignment +_+ . My shot fell flat and lifeless, there was no moving hold, stewie stops abruptly when he hits the poses, and many more :( . I was probably 36000 feet above the ground and i was so devastated inside the plane -o-! I came into one realisation that if the non-weighted tangent gave an easier way to clean up the curves, this could mean that everything that we put during the blocking (timing and spacing, etc) is most likely near perfect.

This perhaps is a very logical thing and maybe i should have understand this earlier. I heard a lot of people say that we should look at the action that is happening on the screen, not the curves on graph editor (Having said this, i do respect the people that use a lot of graphic editor on their workflow). Ironically i have mentioned this to a lot of people because i thought this is the right thing to do. I guess the reality really hits me this time around and i'm really glad that i experienced this, now i really know that we can not abuse graph editor like what i did and our priority should be on the action that is happening on the screen. I really feel that we should monitor both of the screen and the graph editor. The best way to put this and like what my mentor told us, use graph editor as an assistant.

One last thing that i learnt from my long blocking stage is time and spacing. I think i sort of find a new side of these two principles. I can't really explain about it cause i'm still unsure. I'm really looking forward to test this on my next shot.. o_O..

Here are the playblasts from week 4:

one part that i like on this blocking ^^


not too sure if i used this one for splining.. it has huge pop..

Spline! O_O!


---

In honour of splining week, 
let's keep moving forward, have fun, and don't forget to eat! :d
Happy animating! :)


---

Chapter 3 - Blocking + + + + +

I continued blocking my shot on week 3. This week i tried to add as many information that i need for my shot. Couple things that I considered to add were overlapping action, drag & follow, arc, timing & spacing, clarity of the poses & silhouettes, details on hands-fingers. I tried to add a bit of moving hold by altering the next pose slightly. However, i did not think i did it well enough and i think it is kind of hard to add moving hold during blocking stage. There is one bad thing that I notice on my workflow. I tend to focus on the first part of the shot and then i lost a large amount of time to refine the second part of the shot. Unfortunately, this happened again :( . I was very focus on the first half when he is kneeling and did not spend a lot of time for the part when he gets up and jump. I'm currently trying a new way to work on my shot. I guess the solution for this problem is to be discipline with my own time :| ... These are some playblast of my progress from week 3 :


---


Tuesday, April 24, 2012

Change a Tick Colour on Maya Timeline - revised

Hi everyone!

Last week, I tried to find out how to change a tick colour in Maya to indicate which one is my main pose key and which one is my break down pose key. There were a couple of reasons that made me looked for a script that could change the tick colour (it's a simple MEL script.. dont worry ^^).

Firstly, i want to try something new for my workflow. I really want to learn about key frame efficiency. During the class, our mentor taught us that our animation should be defined by key pose and break down pose. I was and i actually am still very inspired by that. He also showed us that we could use tradigitools to change the tick colour to indicate which one is the Key Pose and which one is the Break Down Pose. I think that was pretty awesome. I don't have tradigitools, so i thought there should be a way to change a tick colour in Maya manually.

I bumped into couple of web pages that show me how to do it step by step. I don't have Maya with me at the moment so i'm going to refer you to this sites that i found:
- Great Tip To change Maya Key Color

I also discussed this MEL script with my classmate, Beau Pratt (please check out his and his brother awesome blog here!), about how to make this script keyable. He told me to try to add another script that he got from Kevin Freeman, to the beginning part of the script. 

At first, I created a short cut on Maya Shelf to make an easy access to this script. However, I have to credit Beau for his suggestion about setting a Way better short cut which is to set it to a Shift+S or S (or something else related with S key, anything that is available basically..) on the keyboard. This really makes life easier. So thank you Beau!

The original mel script:

keyframe -time `currentTime -q` -tds 1;

Additional script to make it keyable:

$now=`currentTime -q`;setKeyframe;keyframe -time `currentTime -q` -tds 1;


I guess that's all for now. I hope the script will work on your computer, cause so far it works just fine in my Maya. I really hope it will work just fine in your Maya too! Please let me now if it did not work, i'll give my best to help you out! :)


Thank you very much for reading this post! I  hope this will help and feel free to send me a message on AM or leave comments here if you need any help! Have a great week, Happy Animating, and Have fun everyone! :)

 ---

Thursday, April 12, 2012

Chapter 2.1 - Sketches

Some sketches that i did last week.. i haven't done much sketching lately.. it was good to draw again..
and I've never drawn a scenery in proper way.. so the last drawing here would be my first attempt.. looks like i turned a rock into a giant egg hahah! i had fun though! :)


---

Maya Tools : Animation Snapshot | Timing & Spacing Webinar

Hello!
I'd like to share some trick that I used to do to check out my character's Spacing. I used Animation Snapshot in Maya to help me to understand Spacing. There are some other tools which are better than Animation Snapshot but for now i would like to write about this tool first.

At first and in fact up until today, I am still struggling to understand Spacing. I used to use Animation Snapshot to sort of give me a clue about what is spacing, to show the ball position on the screen.
So folks, let's jump to the tutorial! :)

1. In this tutorial i'm going to use AM's simple ball rig.
- So, let's Open our scene in Maya.
- On my workspace (please see the image below), I have my Outliner open.

Here I have already put some values to the Ty and Tz
*In order to get this tool works correctly, you should have some animations on your character already. Keep reading the walk through.. everything will make sense later ^^

- If your Outliner is not there you could click this icon:


*Just in case your Outliner disappears, you could also find it on Window > Outliner.

2. On your Outliner, select your ball rig : ball_ctrl
- Click the [+] button on its left to expand the menu.
- You will see Locator 1, click the [+] on its left side again.
- Now you should find Ball Geo, click to select the Geometry (please see the image below)
*make sure that you only have this one selected because we only need a snapshot of the Geometry.


3. Go to Animate > Create Animation Snapshot  . Click the box to open the tool's full option window.


- On the Option Box, you should see something like this:


- Before we do anything, this is not compulsory but i would recommend you to Reset the Settings just to make sure that everything is set on Default.


- The only thing that I played around in this tool is the Start and End time. I like to set the time range manually instead of set it according to the Time Slider. You could set the time range base on the Time Slider if you want to :) This is just my personal preference. I pretty much leave the rest of the options on default settings.

- Once you are ready, click Snapshot. If you want to keep this Option Box open, click Apply.

- On your screen, you should now see something like this :


- You could start editing your curve now :) the cool thing from this tool is you don't have to keep updating the snapshot because this tool will do it automatically.. or in other word is live update :|

- At this stage you could use this tool check on your spacing and see if your animation pops or not,
ie: see if it has huge gap that may cause a pop, a frame before the ball lands.


4. The only thing that you should be very careful is if you want to change the Time Range.
- To change the Time Range, we could simply repeat the steps above and change the Start and End Time values.
- Before you do this, Go back to your Outliner and you should see a new item called snapshot1Group, I would recommend you to delete this before you proceed. The reason is because we don't want to pile up unnecessary items in our scene. This will make your file size bigger and most likely will slow down your system and the worst case scenario, it could crashes your Maya.
- So make sure that you only select the Geometry of the object that you want to analyse and apply this tool to One Geometry at a time to avoid system crash. Otherwise you will get something like this:


and yes i did this a lot too D: not so pretty huh? ^^


see this one looks much better ;)


It looks like this if you had the geometry display on (click 4 on keyboard)

This tool pretty much helped me to see how my spacing looked like on my shot. However, i have to say that this tool did not give me a 100% understanding about Spacing. Remember that a Tool is just a Tool, it is there to assist us (i probably just stole that line from my mentor.. !:| ) but anyway.. the point is we should not rely on this 100%. As i mentioned before, you could use this to detect if there is a pop on your animation, to check whether you are on the right track or not, etc.. but remember you should not give your heart and soul to this tool. The down side of this tool is it could consumes a lot of RAM and this would cause problem when we use more complicated rigs (more geometry + more ram = crash :( )

One tip that my mentor told us was Write a list of the Animation Principles and have that list near you when you're animating. This is a golden tip in my opinion.. and i'm really grateful that he shared this tip with us!

Speaking about Spacing, some of you may have watched this webinar and some of you may have not, but if you have a spare time I would highly recommend you guys to watch this webinar hosted by Aaron Hartline and Victor Navone :

Timing and Spacing webinar


There are some very precious demo up there and I find this webinar very, very, very helpful! :)

also the bonus clips from Animation Mentor YouTube Channel:


That's it for now. I hope this helps and thank you very much for taking your time to read this post! If you have any questions or if you found any points that is unclear or confusing, feel free to message me in AM or leave your comments here.

Happy Animating and Have Fun guys! :)

---

Wednesday, April 11, 2012

Chapter 2 - The House of Haunted Keys

I started my blocking last week. After the lecture and the class, I really want to try a new workflow. This time around I really pay attention for the amount of key that i put in. I really tried to make sure that each keys flows nicely, I believe that I have to put more breakdowns this week. I also found out that I did not exceed the frame limit, in fact it was pretty close, I had my shot end at f240 on my planning and I have it ends at f230. I don't know if this is a good or bad thing cause for some reason I don't trust the numbers. I feel that it better to trust the instinct and the feeling instead of the numbers.

A little bit off the track here. I think next time I should analyse the video reference that has a correct angle. I think this would make the drawing stage easier. Looking back at the drawing, i think some of the shapes there are not correct..but at the end of the day, i think this all come back to our ability to analyse the reference and our body mechanics :O .. Here is the blocking for my shot.. there are tons of stuff that need to be refined here D: 


---

Chapter 1 - Intro

Class 4!! Woooo!!


Emoticonswallpapers.com

Congratulations for everyone! We make it to class 4! Half way through the program folks!

I'm glad that i make it this far :) Honestly speaking, it was hard to keep myself motivated and staying in front of computer for 24/7 did not help at all. One thing that hit me, i realized that i have to have a life beside of studying. My biggest fear is to start to have a feeling that this is a burden, which I clearly don't want that to happen and I won't let it happen because to hate the stuff that you want to do in your life is just silly :| 
Back in my uni days, i encounter some people and including myself said that it's a love and hate relationship with Maya or with whatever we dealt with. I guess if you love to do something, this thought should not exist. So, from now on, there is no such thing as love and hate relationship :) Let's fill everything with Joy! *cheers :D
and um .. a quote from my favourite writer, "The greatest expression of rebellion is joy." - Joss Whedon

Unlike last term, I feel less anxious when this term started. Last term i was very anxious because it was my first time to have different mentor! I guess this pretty much explains why i feel less anxious :| 
So, moving on to this new term.. we all have new mentors for sure.. and get ready for the big reveal .. ... .. 
My New Mentor .. for Class 4 .. is .... .... ... *wait for it ... .. .. ... ...

It's Dimos Vrysellas everyone!!

I remember I watched his lecture back in class 2 and it was really really great, i still remember the last line that he said on that lecture! .. but i'm not so sure if i could or should say it here.. :| oh well.. let's carry on~

So this week, we have to plan our shot and it should have contrast in emotion. I think this is harder than it sounds. I always want to create something that is unusual. I don't know if this is a good thing or not :/ sometimes.. actually most of the time, my ideas are a little bit hard to be understood by a lot of people.. and this has been going on for quite awhile :| i brainstormed some ideas and i have my brainstorm pages here:


I had couple ideas such as concert ticket, prison break, home alone and toilet idea. I had to narrow it for sure. Some of these ideas were based on personal stuff, except for the prison an toilet! or .. maybe just the prison :| anyway! i decided my theme which was home alone. At first i was going to do a shot about a kid who thinks that she has to protect her home when the parents are away. I like this idea, however with 250f frame limit.. i doubt that i could set up my story. My class 3 mentor teaches me a lot about setting up a story and i learn that setting up a story would need a decent amount of time. I also had an idea to have 2 characters on my shot. I have a doubt about this idea so i decided to mail my mentor and he suggested to keep it simple and to use only a character. I went back to my sketchbook and just wrote down couple ideas, kind of make a list about what usually happens when someone is home alone (see the second page above). After couple hours of random YouTube browsing :| the Ghost idea came up.. Well, the story that i'm about to use for my shot has never happened before in my life. However, i believe i saw and heard something in the past .. D: So, i guess this still counts as personal experience and i decided to use this idea. 

Before I started my planning, I had already have this image of a person drawing, painting, and i think he's actually writing calligraphy in his home office. He's either an artistic European uncle with funny hair or mid 30 Japanese hero look writing calligraphy. In the end, i lean more into the artistic European uncle with funny hair inside his.. living room. (In my head now i have him living inside a mushroom house ... uh well i have funny imagination -o-" ). 

The next step was preparing my character. I finally able to do something i have not really done nicely before, which is customizing Stewie! I did not customize the whole body, I only re-shaped his head and this strangely made me happy :) I finally made that big round head thinner :D

This time around i took my video reference first. I set up my living room so it would look like the setting that i want to have on my shot. Afterwards, I narrow down the shot that i like and i did something new here. Instead of finding my key poses and draw it right away, I frame through my video reference and analyse what is happening on the body. This is something that i learn greatly from my previous mentor. I wrote notes beside the poses that i trace. Yes i traced the poses instead of drew them. As I carry on, i realized some problems on my planning. Half of my body was covered behind of the table and the shot was shot from front view. I feel that we should avoid this angle if we can, the reason is because orthographic view would give less dimension for our character. So i decided to shot another reference from 3/4 angle and sketched new poses in 3/4 angle and use my first drawing/tracing as my reference. This time around i didn't do 2d test.. I sort of want to test my timing skill.. which unfortunately is still very off :( I almost went over the frame limit here. I was worried because the video reference itself went for approximately 20s for each takes. On the following week, i found out that i still have some space. We'll talk about this on the next post. Here are the drawings and the character:

first drawing/tracing :| 

new planning

the artistic European uncle with funny hair

---

Thursday, April 5, 2012

Workspace & Posing Tips

Hello!
I'd like to share couple things that i always do right before i start working on my shot. I got this tips from a q&a that i attended and from the lectures. I also kind of spice it up a little bit to suit my workflow :)
I'm going to pretty much talk, or maybe more appropriately write about how i set up my workspace. So here I go:

1. Starting up


In this tutorial I'm going to use Stewie :) so let's open your scene file in Maya.
Firstly, i like to hide the other elements that i don't want to see on my view port.
Here is how to do it:
- On your Main view port, go to Show> and choose None. Stewie will dissapear right after you do this :)
- Next, Go back to Show> and tick NURBS Curves, NURBS Surfaces, and Polygons, you could see them on the screenshot below (please click to resize ^^'') :

Now you should have a clean view of Stewie :)

2. Copy Panels

I like to Tear off a copy of the view port Panel that i'm going to work on.
I would recommend you to copy the panel that will be used as the main camera angle for your shot.
For a purpose of example, here I copied the perspective view instead of my main camera angle..
Here is the step to do it:
- Firstly, on your view port go to Panels> choose Tear Off Copy...
- This will give you a copy of your Perspective or any view ports Panel.
Please see screen shots below:


New Tear Off Panel on screen left

A new panel window should pop up now.. and you could adjust the size of this copied panel and positioned it wherever you want on your workspace :)
You could always use the layout that has been provided by Maya and customize it. I found that if i have a side by side layout (ie: Perspective/ Front, Perspective/ New Camera) the camera gives me this funny wide angle effect like this:

This of course could be easily fixed by making the left panel bigger and this is not a big problem at all.. but i prefer to have my Main Camera - the one that i use to tweak my poses - on one big screen ;)

3. Lighting

On your new Tear Off Panel, choose Lighting> select Use No Lights and press 7 on your keyboard :
These are the screenshot of the result that you should get simultaneously :


Note: you could also press the highlighted button to turn off the light

Now you should have a mini copied window that could work as your 'Silhouette Monitor' :)

4. New Camera

On your workspace, you should now have your Main Panel and your Tear Off Panel
On your Main view port Panel, go to Panels> Perspective > New
This will give you a new Perspective camera and you could rename it too. I would recommend you to do this to avoid any confusion in the future. I usually use this new camera as my Main shot camera.
Below are the screen shots:


New Camera on the Main view port

This new camera will allow you to tweak your poses without changing your main camera angle and you could monitor your silhouette at the same time as well!
I would suggest to decide your main camera angle at early stage. This would train you to have an ability to choose and commit to one best camera angle that you want to use when you animate your shot (i'm still working on this myself! >.<!)
You could try to do this tips at any stage of your workflow, i personally always do this at the beginning stage of my workflow.

5. Posing Tips
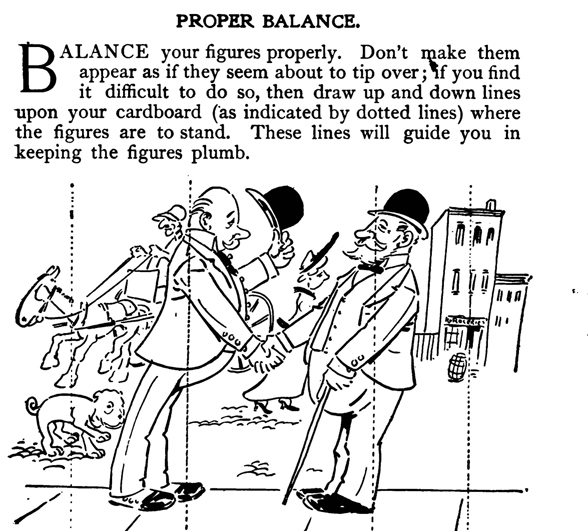
  • Pose your character in perspective view. This way you could monitor not only the X axis (translation X) but also the Z axis (translation Z) of your character's balance.
  • Pay attention to your character's balance. Check the position of your character's center of balance and draw a straight line from that point. The amount of the weight on the left and the right side of the body should be approximately equal.
  • Here is a video about balance:  

  • Draw Line of Action (LoA) over your pose using a program like Annotate Pro, Screen Marker, or you could also use a Dry Erase Markers, draw over your your pose on your monitor :)
  • Follow the Line of Action to push your poses even further!
  • Always check on your silhouette, it should look clear and readable. Avoid tangents as much as you can as this would make your silhouette clearer. I think this blog entry has a great explanation about tangents : Art School 101: TANGENTS
  • my mentor advice that i'll always remember is to have your character in 3/4 view. This angle will give more dimension on your character and it will look more appealing than a pose that is seen from a front view.
I would also recommend you to read the following blog entries :

So that's it for now! Thank you very much for your time to read my post. 
If you found any points that is unclear or confusing, feel free to leave comments or send me a pm on AM.
I hope this helps and most importantly, Have Fun guys! :)

---

Wednesday, April 4, 2012

Chapter 12 - Oompa Loompa~

Week 12..
I'm not too sure why i have Oompa Loompa as a title for this week entry.. that was the first words that appeared in my head right before i started writing this entry.. maybe it's a time for some candies!
Speaking of sweets.. this is one of my favourites :D i went crazy for this one cause we don't have it back in my home town, i haven't had this for awhile though :d :


Back to the main topic, I refined my digging shot (and also the other 2!). I found so many mistakes in this shot and i feel really glad that i found them. This term i learnt abundance new knowledge. They are mostly an eye opener materials that i wished i had known earlier :) Every week in this term was full of surprise. Most of my problems were literally explained on the following week's lecture. Honestly, i had this urge to start my shot from the scratch around week 10 because of the amazing stuff that was explained on the lecture, but that's probably not the best move since i have only +/- 2 weeks left to finish the shot, and i kinda glad i didn't do it !:| .
Also, i will not forget to mention the awesome class q&a every week, i really respect and appreciate what our mentor, Tim, has taught us over the last 12 weeks! I learn a ton about body mechanics, characterization, and especially story telling from him. I also learn one new very valuable tip from him, which is analysing body mechanics from video reference (both cartoon and real life footage). This really teaches me not only to find the key poses and draw it, but also to really understand what is happening on the body. There are a lot of things that i definitely have to learn. I really want to thank him for everything, lot's of respect sir! :)
So here is, at last.. my progress reel for term 3 .. 2 .. and 1 :)


---

actually... why dont we close this entry with some amazing and hopefully inspiring videos from a movie that makes me want to be involved in this industry in the first place! :D
To all my Big Folks, enjoy!


Thank you Mr Peter Jackson, my life would be different if i never saw Lord of The Rings :)

---

I do not own the videos above..i'd like to simply share them with everyone here and i hope they will inspire you guys as well...
Please visit the xXmellemXx YouTube channel for more cool LoTR videos.
~Cheers~

Tuesday, April 3, 2012

Chapter 11 - Disco_very

(speaking with panda eyes and zombie strenght) : "Al...most.... theree .. .. gooo goooo gooo!!"

that is an exaggeration from week 11.. ^^"
my PC has been working 24/7 for the last few weeks.. it has forgotten the meaning of Shut Down button.
At the beginning of this week, our mentor left critiques for the class as always.. I discover something that i wish i had discovered at earlier stage. This would be about the critique. Listen to a critique is probably not enough, i found that not only we must listen to our mentor critique, but we should also try to kind of put our feet on our mentor and/or other people shoes and see the work from the third point of view. I hope I make any sense. A lot of people has mentioned this, but it is not easy to actually do it. This week, there is something that clicked in my head and as cliché as it sounds, we're the most critical person when it comes to critiquing our own work. I tried out to be as honest as possible to myself, I tried to see my shot and write down a critique in my book. It was a quite long list. Interestingly, i could see my shot inside my head playing more clearly, just like the way it should be. I come into a conclusion, i should have this image playing nicely in my head since the beginning. I think this means that my planning is probably not strong enough and I was most likely losing a grip of my shot as i progressing onwards.
So here are couple of playblasts from week 11, i wish i did a revision for my digging shot too :( i still regret i didn't do it, anyways here you go :

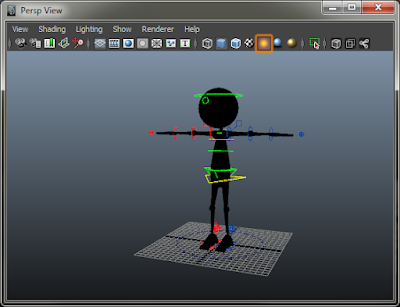
I like to switch off all the props including the lighting, this gives me better view of the silhouette.
The 2d look in this playblast helps me to see and treat the shot like a traditional animation, well of course not technically :) .. it gives me the feel that i'm watching good ol tom and Jerry cartoon, it reminds me to have a lot fun when i animate my shot :)


the shot with props back in action.. and looks who's on the painting! :D


another one, changed and refined the arms movement when stewie steps forward


---